
Your home becomes a 2–90 day controlled lab. Professionals assess your foundation, place detection devices in your lowest living area, and seal windows and doors tight. They monitor temperature, humidity, and air pressure hourly while documenting everything. After retrieval, an accredited lab analyzes results within 48 hours. You’ll get clear data against the 4.0 pCi/L safety level plus customized mitigation plans ($1,200–$2,500). Keep scrolling to uncover exactly how each step protects your family’s health.
Key Takeaways
- A professional inspector evaluates your home’s structure, foundation cracks, and potential radon entry points before testing begins.
- Detection devices are placed in your lowest lived-in area and sealed away from windows, doors, and heat sources.
- The testing environment is carefully controlled by sealing cracks, gaps, and vents to ensure accurate radon measurements.
- Environmental factors like temperature, humidity, air pressure, and weather conditions are monitored hourly throughout the testing period.
- After 2–90 days, devices are collected, analyzed in accredited labs, and results are interpreted against the 4.0 pCi/L action level.
Initial Assessment and Home Evaluation
Structural Inspection Happens First
- Your inspector checks basement walls thoroughly
- They identify potential radon entry points
- Foundation cracks get documented carefully
Occupant Interviews Come Next
Your inspector will ask you important questions.
How long have you lived here?
Do you notice unusual odors?
Have family members experienced health issues?
These answers help professionals understand your home’s radon risk level.
You’re basically the expert on YOUR house!
Why This Matters
A thorough initial assessment creates an accurate testing foundation.
Your inspector gathers critical information about your home’s unique characteristics.
This guarantees they place testing equipment in the right locations for honest results.
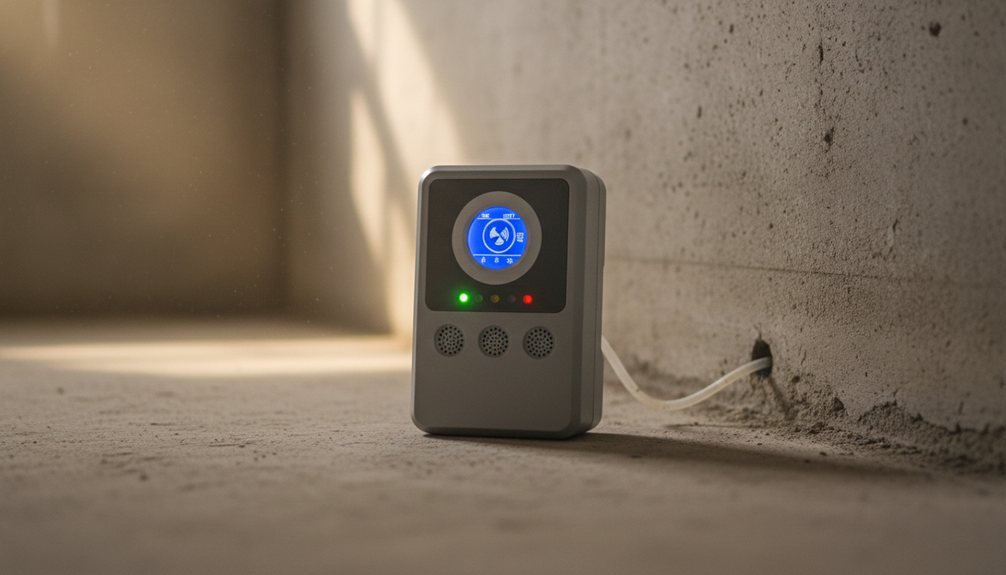
Placement of Radon Detection Devices
Once your inspector’s got the home assessment locked down, it’s time for the real work.
Strategic Positioning Matters
Your inspector places devices in specific locations. They’ll put them in the lowest lived-in area first. That’s typically your basement or ground floor. This captures the *highest* radon concentrations where you actually spend time.
Long Term Placement Details
Long term placement stays put for 2-90 days. Alternate devices measure shorter periods too. Your inspector might use charcoal canisters or continuous monitors. Each method catches different radon patterns.
The Setup
Devices stay away from windows and doors. Heat sources? Nope—they skew results badly. Your inspector documents everything with photos and measurements.
What You’ll See
You’re looking at professional-grade equipment. These aren’t DIY kits. They’re calibrated. They’re reliable. They’re *exactly* what you need!
Sealing and Securing the Testing Area
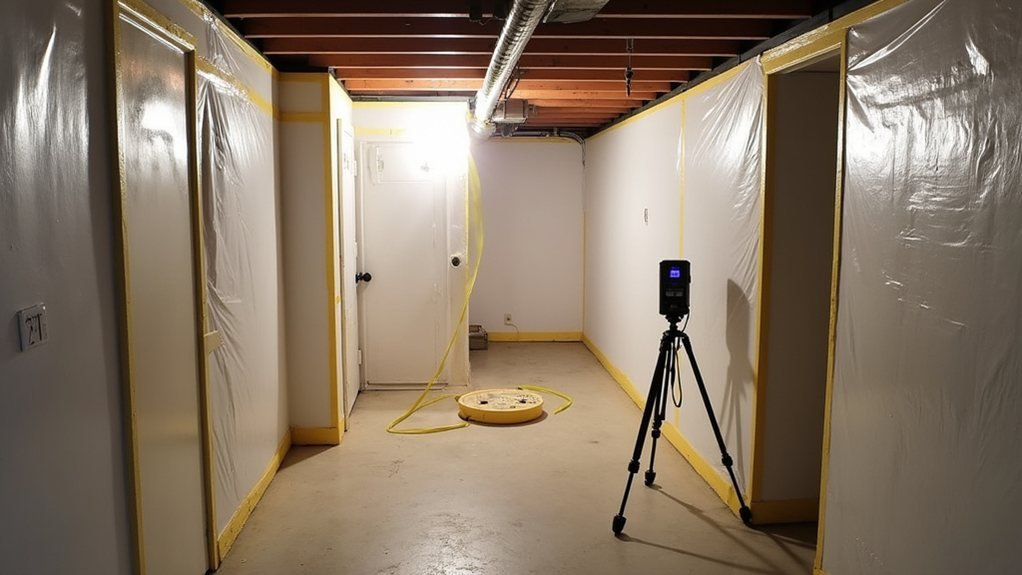
Now here’s where precision kicks into high gear. You’re about to lock down your space like a pro!
Why This Matters
Entry points mapping is absolutely critical here. You’ll identify every crack, gap, and opening that air could slip through.
This creates an accurate baseline for radon levels.
The Sealing Process
You’ll seal windows and doors temporarily. Not permanently—just enough to control airflow behavior during testing.
Key actions you’ll take:
- Tape exterior doors shut
- Close all windows completely
- Block unused vents temporarily
Securing Success
This controlled environment gives you honest radon readings.
You’re fundamentally creating a snapshot of your home’s real radon situation.
The tighter your seal, the more reliable your results become.
That’s your guarantee of accuracy!
Monitoring Period and Data Collection
Here’s what happens during monitoring:
- Real-time alerts notify you if dangerous radon spikes occur during testing
- The detector automatically timestamps each measurement for accurate tracking
- Data streams constantly into the system with zero manual intervention needed
You won’t see dramatic changes hourly. Radon levels fluctuate naturally based on weather and air pressure.
That’s exactly why extended monitoring matters so much! The longer your test runs, the more reliable your results become.
This thorough data collection gives you the complete view of your home’s radon situation.
Environmental Conditions Documentation
Your radon test results aren’t just numbers—they’re a complete story!
The technician documents everything happening around your home. Temperature logging tracks how warm or cool your space stays. Humidity mapping shows moisture levels throughout testing. Both matter enormously for accurate readings!
| Factor | Why It Matters | Range Tracked |
|---|---|---|
| Temperature | Affects radon movement | 60-80°F typical |
| Humidity | Influences gas behavior | 30-60% ideal |
| Air pressure | Changes radon flow | Monitored hourly |
Your test captures real conditions your family experiences daily. Wind patterns get noted. Door and window positions recorded. HVAC systems documented. Every detail helps explain your radon levels accurately.
This environmental snapshot guarantees your results reflect YOUR actual home. No guessing. No assumptions. Just honest, complete data safeguarding your family’s health!
Device Retrieval and Laboratory Analysis
Once we’ve captured all those environmental details, here’s what happens next. Your radon test device gets picked up by our certified team. We handle everything with serious care and professionalism!
What makes this process trustworthy:
- Chain of custody documentation tracks your device every single step. Nothing gets lost or mixed up along the way!
- Blind duplicates get analyzed separately to verify our accuracy and guarantee honest results.
- Laboratory certification means real scientists examine your samples with precision equipment.
Your device heads straight to our accredited laboratory. Scientists measure radon levels using advanced technology. They document everything carefully. You’ll receive detailed results within 48 hours.
Our process is transparent, reliable, and genuinely thorough. You’re getting legitimate answers about your home’s radon situation!
Results Interpretation and Recommendations
Below 4.0 pCi/L? You’re good! Your home’s radon levels are safe.
Above 4.0 pCi/L? Time to act! Increased radon poses serious health effects including lung cancer risk.
Your Next Steps
The lab report includes professional recommendations customized to your situation. They’ll explain mitigation costs based on your home’s specific needs and radon concentration levels.
Taking Action
Don’t delay! Contact a certified radon mitigation company. They’ll design a system reducing your radon levels safely. Most mitigation costs range from $1,200 to $2,500 depending on your home’s structure.
Your health is worth protecting!
Conclusion
You’ve got your radon levels! Think of this data like a home health checkup. You’ll know exactly what you’re dealing with. High readings? Don’t panic! Mitigation systems work extraordinarily well. Low readings? Excellent news! You’re protecting your family from invisible danger. Either way, you’re making an informed decision. That’s powerful stuff. Stay vigilant and retest every two years!
