
You’re extracting radon gas from beneath your foundation using depressurization pipes and a powerful fan running 24/7. The system creates negative pressure below your home, forcing radon upward and away through vertical pipes extending 10+ feet above your roofline. Sealing foundation cracks enhances efficiency by 40–60%. Smart monitoring alerts you instantly to pressure changes. Annual inspections and filter replacements keep everything working perfectly. Understanding each component’s role reshapes your protection strategy markedly.
Key Takeaways
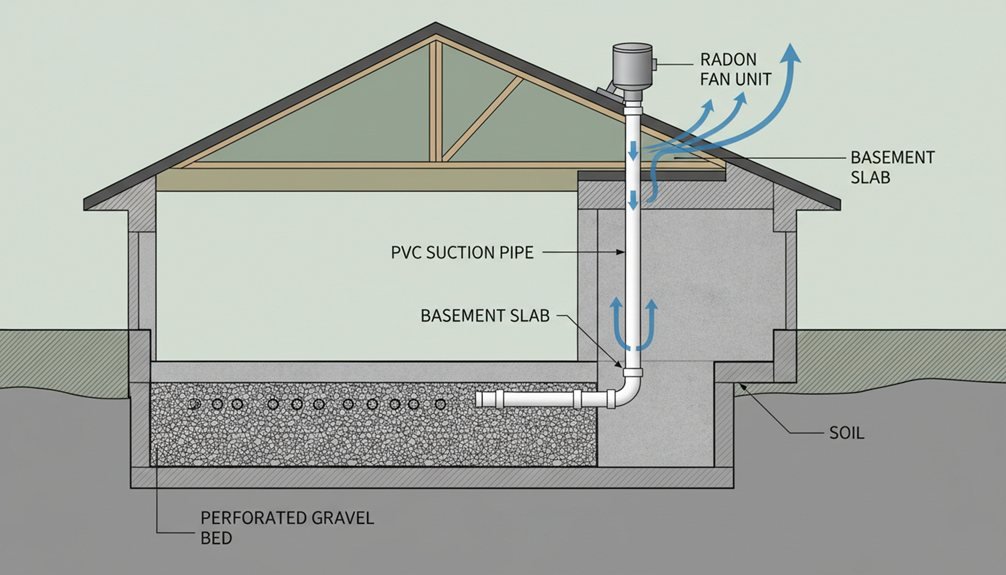
- Soil depressurization pipes extract radon-laden air from beneath the foundation and route it safely above the roofline.
- A 24/7 fan creates negative pressure below the foundation, forcing radon gas upward and away from the home.
- Ventilation stacks extend 10+ feet above the roof to enhance natural draft and prevent radon backflow into living spaces.
- Foundation sealing closes cracks, gaps, and sump lids to block radon entry points and improve system efficiency by 40–60%.
- Monitoring systems track pressure differences and radon levels with wireless alerts, while annual inspections and filter replacements maintain effectiveness.
Soil Depressurization Pipes
Imagine this: radon gas is literally escaping from the soil beneath your home right now.
Here’s how you stop it.
You’ll install pipes that perform soil extraction directly from underneath your foundation. These pipes pull radon-laden air away from your home’s base. That’s genius, right?
Pipe routing matters tremendously. Your contractor runs pipes vertically through your walls or exterior. They extend above your roofline—at least 12 inches higher than nearby windows. This prevents radon from sneaking back inside.
Why this works:
- Creates negative pressure below your foundation
- Forces radon upward and away
- Protects your family from dangerous exposure
The system runs continuously using a powerful fan. Most homeowners see radon levels drop dramatically. You’re literally breathing easier now.
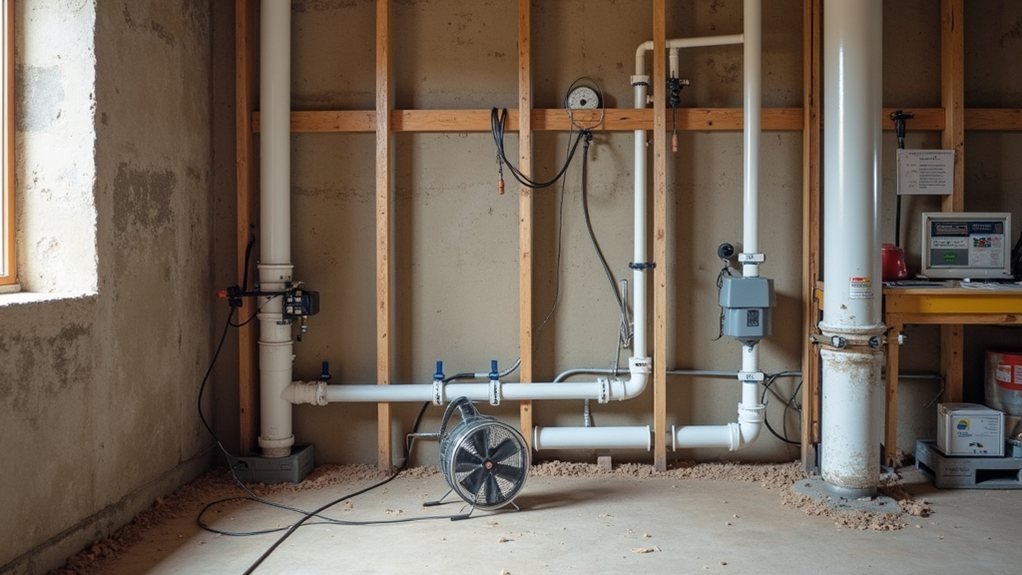
Radon Fan Installation and Operation
You’re looking at the heart of radon removal. Your fan continuously pulls radon gas upward and away. It runs 24/7 for maximum protection.
Installation Essentials
- Place the fan in your attic or crawlspace
- Guarantee proper electrical groundingfor safety
- Keep it accessible for maintenance checks
Managing Fan Vibration****
Fan vibration happens naturally during operation. You’ll want to mount it securely. Vibration dampeners reduce noise markedly. This keeps your system running quietly and efficiently.
Keep It Running
Your fan needs yearly inspections. Check for blockages regularly. Replace filters as needed. Proper operation means your radon levels stay low. You’re protecting your family’s health daily!
Ventilation Stack Design
Once your radon fan’s installed and running, it’s time to build the pipe that carries gas away.
Stack Height Matters
You’ll want your stack height reaching at least 10 feet above your roof. Higher is better! This creates powerful airflow balancing that prevents radon from sneaking back indoors.
Key Design Elements
- Vertical placement keeps pressure consistent
- Proper diameter (typically 3-4 inches) maintains velocity
- Termination cap stops rain from entering
Why This Works
Greater stack height creates natural draft. Your radon fan pushes contaminated air upward rapidly.
That airflow balancing prevents pressure from building up and pushing gas back down into your home.
Think of it like a chimney—height equals power!
Sealing and Air Leakage Prevention
Your stack’s working hard to push radon out. But here’s the thing—air leaks ruin everything!
Why Sealing Matters
Think of your foundation like a leaky bucket. Radon sneaks through every crack and gap.
You’ve got to seal them tight!
Key Sealing Points
Start with your sump lid. This opening’s a radon highway. A quality sump lid blocks radon completely.
Window sealing prevents outdoor radon from entering upper levels.
Caulk those frames thoroughly.
The Real Impact
Proper sealing increases mitigation efficiency by 40-60%.
That’s enormous!
Your system works smarter when you eliminate air leakage.
Action items:
- Inspect foundation cracks monthly
- Caulk all window frames
- Install airtight sump lid
- Seal utility penetrations
You’re creating a radon fortress!
Pressure Monitoring Systems
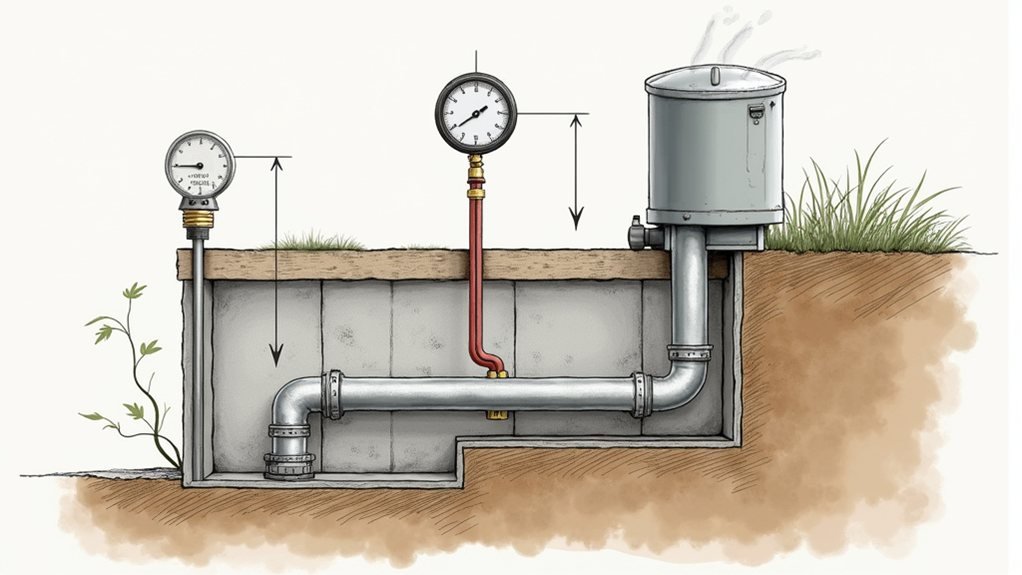
These systems track pressure differences inside your home. You’ll catch problems before they become disasters!
Continuous Monitoring Power
Your system watches radon levels 24/7. Real-time data keeps you informed constantly. No surprises. No guesswork.
Smart Alerts
Wireless alerts notify you instantly when pressure changes occur. Your phone gets the message immediately. You’re always connected to your protection.
Why It Matters
Early detection saves money and stress. You’ll know exactly when your mitigation system needs service. Stay ahead of radon completely.
The Bottom Line
Monitoring converts radon defense from passive to aggressive. You control your home’s safety. You’re no longer guessing.
Discharge Point Placement
Roof Vents
You’ll push radon gas way above your home. This keeps it from re-entering. Roof vents work fantastic for most houses. They’re the gold standard in the business.
Yard Exhaust
You’ll direct the pipe away from windows and doors. Place it at least 10 feet from openings. Ground-level discharge needs serious distance planning.
Critical Placement Rules
- Keep discharge pipes away from air intakes
- Avoid low spots where gas pools
- Never discharge into crawlspaces
- Position pipes 4+ feet above ground level
The higher you go, the better! Proper placement prevents radon from sneaking back inside. Your family breathes easier when you nail this detail.
System Maintenance and Testing Requirements
Installation’s done—but the work doesn’t stop there. Your radon mitigation system needs regular attention to perform flawlessly!
Keep It Running Strong
Annual inspections are absolutely essential. You’ll want a professional checking your system yearly. They’ll verify everything’s working at peak performance.
Filter replacements typically happen every 12 months. This keeps airflow ideal and efficiency high!
What You’re Looking For
- System still running smoothly?
- Any unusual noises or vibrations?
- Is the discharge point clear?
Testing Schedule
You should retest your radon levels every two years. This confirms your investment is actually working. Some states require testing after system installation.
Bottom line? Small maintenance now prevents expensive repairs later. Your lungs will thank you!
Conclusion
You’re now a radon mitigation expert! You’ve learned how depressurization pipes, fans, and ventilation stacks work together. You’ve perfected sealing techniques and pressure monitoring. You understand discharge placement and maintenance schedules. Honestly? You’ve basically become a radon-fighting superhero—literally saving your home a million times over! Regular testing keeps your system performing perfectly. You’re protecting your family’s health every single day. That’s incredible!
